Frontend Automated Testing
Wiki
In software testing, automated testing refers to the process of using software separate from the software under test to automatically execute tests, compare actual results with expected results, and generate test reports. Once the testing process is established, test automation can automatically perform some repetitive but necessary testing work. It can also accomplish tests that are nearly impossible to do manually. For continuous delivery and continuous integration development approaches, test automation is crucial.
For developers, unit testing and test coverage are important means of ensuring code quality, and during the testing process, automated testing is the most efficient method.
From the perspective of testing form, tests are divided into:
- Black-box testing (only concerned with input and output)
- White-box testing (concerned with specific code logic)
From the perspective of testing levels, tests are divided into three dimensions:
- Unit Testing (UT) — typically verifies functions, methods, classes, etc.
- Component Testing (CT) — typically verifies the functionality and correctness of individual components
- Integration Testing (IT) — verifies the collaborative work between different components, modules, or services
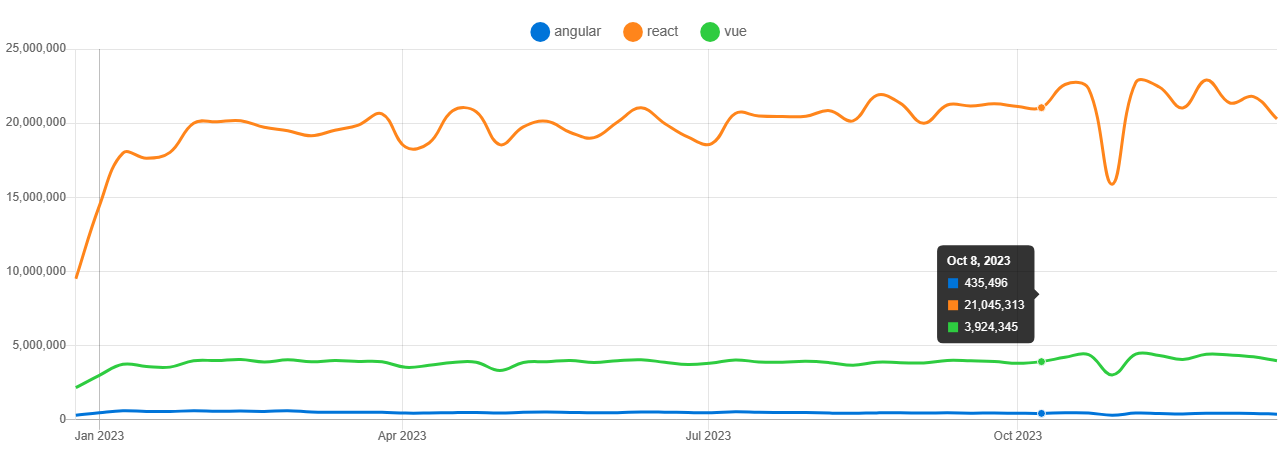
Vue official docs divide testing into three levels:
- Unit Testing
- Component Testing
- End-to-End Testing
This classification basically aligns with our discussion above. The addition of end-to-end testing is because unit and component testing have limited coverage, while E2E can test what actually happens when users use the application.
Unit Testing & Integration Testing
Unit tests are written to verify that small, isolated units of code work as expected. A unit test typically covers a single function, class, composable, or module. Unit tests focus on logical correctness and only concern a small part of the application's overall functionality.
In automated testing, unit testing is considered a form of white-box testing. That is, the test case writer needs complete understanding of the code logic.
Unit tests verify that a specific aspect of a function works correctly.
Test cases generally refer to a group of unit tests. Good test cases consider the various inputs a function might receive.
Full coverage tests include a complete set of unit tests covering all possible ways a function can be used.
For large projects, full coverage testing can be difficult. Therefore, initially it's sufficient to write tests for the most important code, and consider full coverage when the project is widely used.
What to Do When Tests Fail
- Check the test conditions. If the conditions are correct, the code has a bug — don't modify the unit test; fix the code that doesn't meet expectations.
- If there are new feature iterations, supplement the corresponding unit tests with new scenarios after completion.
Only modify related business test cases when business behavior changes are confirmed.
How to Perform Unit Testing
Common test runners:
Test runners provide the execution environment and runtime features, relying on assertion APIs (assertions) for assertion testing.
Unit testing libraries generally have built-in assertion APIs. For example, Jest independently implements Jest expect (Source Code) for assertions; vitest uses Chai as its assertion library while being compatible with Jest expect; and Mocha can even use any assertion library.
Assertion Styles
Using Chai as an example, it supports two assertion styles:
BDD
Behavior-Driven Development. This is also the style used by
Jest expectassertions. It uses a series of chainableassert APIsin a near-natural-language way to describe expected behavior and code output.
// Jest expect
// expect(variable).modifiers.matchers
expect(foo).not.toBe('coconut');// BDD style example in Chai
var expect = require('chai').expect,
foo = 'bar',
beverages = { tea: ['chai', 'matcha', 'oolong'] };
expect(foo).to.be.a('string');
expect(foo).to.equal('bar');
expect(foo).to.have.lengthOf(3);
expect(beverages).to.have.property('tea').with.lengthOf(3);assert
Similar to
node.js'sassertpackage, exposed through theassertinterface. Provides the classicassert.approach.
// assert style example in Chai
var assert = require('chai').assert,
  foo = 'bar',
  beverages = { tea: ['chai', 'matcha', 'oolong'] };

assert.typeOf(foo, 'string'); // without optional message
assert.typeOf(foo, 'string', 'foo is a string'); // with optional message
assert.equal(foo, 'bar', 'foo equal `bar`');
assert.lengthOf(foo, 3, 'foo`s value has a length of 3');
assert.lengthOf(beverages.tea, 3, 'beverages has 3 types of tea');
Unit Testing Workflow
Includes two steps: test case design and test case execution.
Building Test Cases
Using Jest as an example, a unit test generally consists of:
- Test block
- Assertions
A test block is a test function call. The test function accepts three parameters in order:
name— the unit test descriptionfn— the unit test execution, which can contain multiple assertion statements- [
timeout] — optional timeout option, defaults to 5s
import { expect, test } from '@jest/globals';
test('did not rain', () => {
  expect(inchesOfRain()).toBe(0);
});
TIP
You may see it calls in some code. it is just an alias for test, with only semantic differences.
You can use describe to wrap a group of unit tests into a test suite:
const myBeverage = {
  delicious: true,
  sour: false
};

describe('my beverage', () => {
  test('is delicious', () => {
    expect(myBeverage.delicious).toBeTruthy();
  });

  test('is not sour', () => {
    expect(myBeverage.sour).toBeFalsy();
  });
});
Conclusion
Unit testing is typically suitable for independent business logic, components, classes, modules, or functions that don't involve UI rendering, network requests, or other environmental concerns — these are usually pure JavaScript/TypeScript modules unrelated to Vue. But there are two cases where you must unit test Vue-specific features:
- Composables
- Components
These will be covered in detail in the Component Library Testing Workflow section.
Executing Test Cases
Simply run jest from the command line to automatically run all files ending with .test.{t|j}s or .spec.{t|j}s. You can also execute commands based on configuration options.
End-to-End Testing (E2E Test)
E2E testing, or end-to-end testing, is a software testing method that falls under black-box testing. It simulates real user scenarios, relying entirely on browsing the entire page in a real browser to test the application. Its testing focus is on multi-page application behavior, targeting network requests in production environments.
End-to-end testing doesn't import any Vue application code and validates based on the browser. It can typically catch issues with routing, state management libraries, top-level components (commonly App or Layout), public resources, or any request handling.
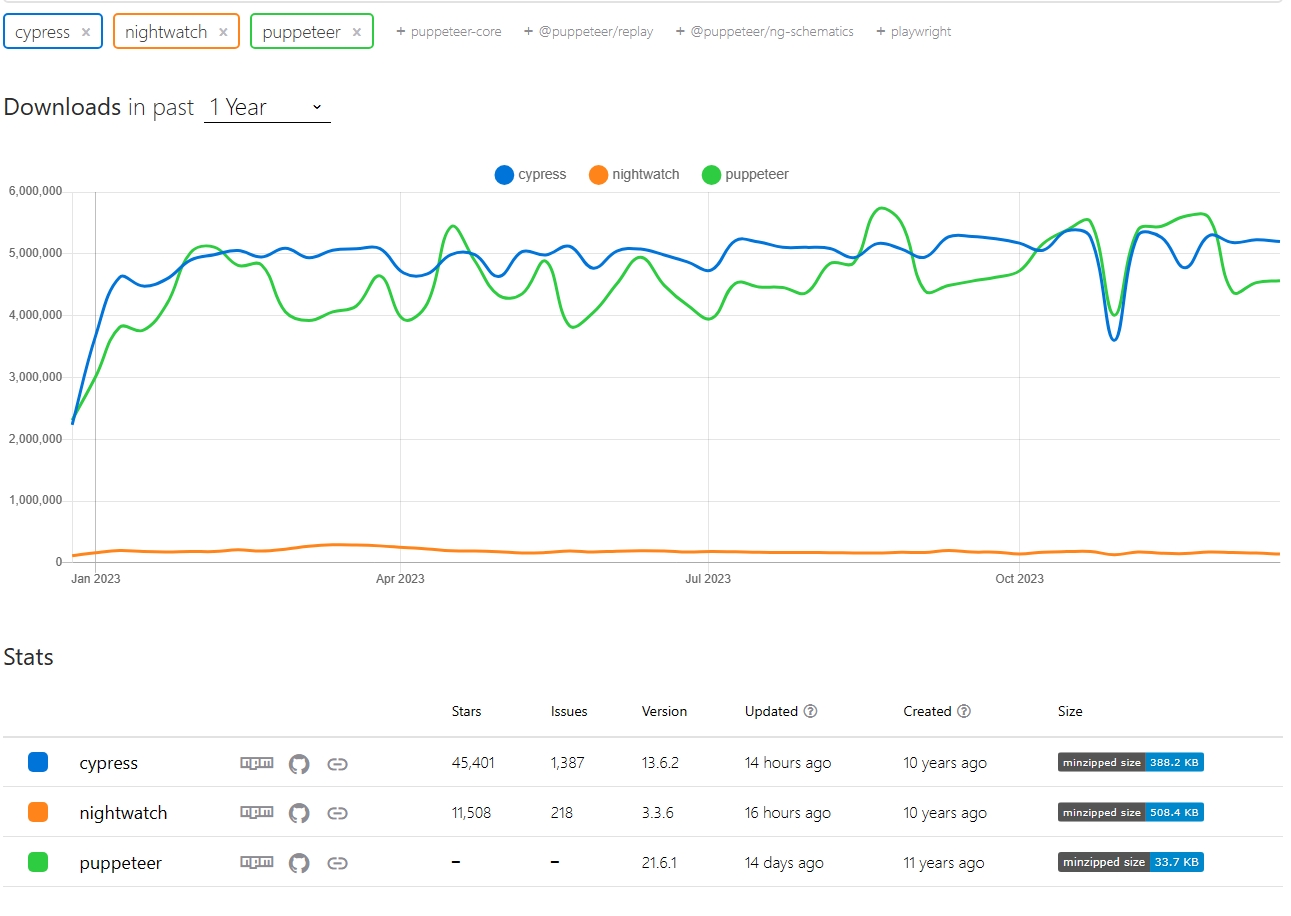
Common tools:
Component Library Testing Workflow
When combined with component-oriented frameworks like Vue and React in the frontend domain, automated testing often becomes complex and ambiguous. Therefore, in practice, multiple aspects need to be considered for automated testing design.
When we talk about unit testing in daily work, it actually encompasses unit testing, component testing, and integration testing in frontend development. At the same time, due to the complexity of business components, multiple testing approaches often need to work together.
Using a vite + vue3 project as an example, when designing unit tests, we must consider test case design for composables and components.
- For simple functions, methods, and classes, we perform unit testing: via
JestorVitestetc. - For component logic, we perform component testing: via
VitestorCypressetc. - If business workflow testing is needed, E2E testing solutions should also be supplemented
Test Case Design
When designing test cases, consider four aspects:
- Default behavior
- Edge cases of default behavior
- Combined behavior
- Edge cases of combined behavior
Test Cases
After installing vitest, for composables or regular functions and classes, testing is as simple as:
// useCalc.ts
import { ref } from 'vue';
function useCalc() {
  const num = ref(0);
  const increase = () => {
    num.value++;
  };
  const decrease = () => {
    num.value--;
  };
  return {
    num,
    increase,
    decrease
  };
}

// useCalc.test.ts
import { test, expect } from 'vitest';
import { useCalc } from './index';

test('useCalc hook test', () => {
  const { num, increase, decrease } = useCalc();
  expect(num.value).toBe(0);
  increase();
  expect(num.value).toBe(1);
  decrease();
  expect(num.value).toBe(0);
});
For a simple component, you can use @vue/test-utils for testing. Since component testing requires mounting logic, the jsdom library is needed for simulation, and it must be configured in vitest:
<script lang="ts" setup>
// UniTemplate.vue
import { computed, version } from 'vue';
import { useCalc, useUniTheme } from '@vue-uni-ui/utils';

const props = withDefaults(
  defineProps<{
    msg: string;
  }>(),
  {
    msg: 'Hello'
  }
);
const { num, increase, decrease } = useCalc();

const title = computed(() => `${props.msg}, Vue@${version}`);
</script>
<template>
  <div class="uu-template">
    <h1 class="uu-template__header">
      {{ title }}
    </h1>
    <div>
      <button @click="increase" data-test="increase">+</button>
      <span data-test="num">{{ num }}</span>
      <button @click="decrease" data-test="decrease">-</button>
    </div>
  </div>
</template>
The corresponding test code:
// index.test.ts
/**
 * @vitest-environment jsdom
 */
describe('test UniTemplate', () => {
  const incBtnSelector = '[data-test=increase]';
  const decBtnSelector = '[data-test=decrease]';
  const numContentSelector = '[data-test=num]';
  test('test default', async () => {
    const wrapper = mount(UniTemplate);
    const title = wrapper.find('.uu-template__header');
    const incBtn = wrapper.find(incBtnSelector);
    const decBtn = wrapper.find(decBtnSelector);
    const num = wrapper.find(numContentSelector);
    // default show hello
    expect(title.text()).toContain('Hello');
    expect(parseInt(num.text())).toBe(0);
    await incBtn.trigger('click');
    expect(parseInt(num.text())).toBe(1);
    await decBtn.trigger('click');
    expect(parseInt(num.text())).toBe(0);
  });
  test('test with props', () => {
    const testMsg = 'test message';
    const wrapper = mount(UniTemplate, {
      props: {
        msg: testMsg
      }
    });
    expect(wrapper.text()).toContain(testMsg);
  });
});
This completes a simple interactive component test. Of course, a component may also have slots, event emitting, and other inter-component interaction events, but they basically won't stray from the testing trio: describe, test, expect.
About vitest
In the example monorepo project, since different Vue versions have different usage patterns, after introducing vitest, Vue 3 tests passed normally but Vue 2 tests failed. This issue can be reproduced in another universal component library template for Vue 2 and Vue 3. That repository uses the resolve approach to redirect vue and vue-demi to different containers, solving compilation errors.
For unit testing, since it depends on template compilation, the template compilation testing library @vue/test-utils also needs to be redirected to different containers based on the Vue version to avoid conflicts and compilation errors.
Theoretically, at this point, running vitest should enable single-codebase unit testing for both Vue 2 and Vue 3 versions. However, running vitest run actually produces the error SyntaxError: The requested module 'vue' does not provide an export named 'default'. This error frequently appeared during multi-version Vue component library development in monorepo. Clearly, the resolve dependency isn't taking effect — when import Vue from 'vue', it's not using the corresponding vue from the container.
vitest relies on vite under the hood to start services, so dependency resolution should theoretically follow vite's logic. But vite dev works normally. Therefore, we can conclude that vitest uses a different dependency resolution approach than vite dev. vitest's node_modules dependency resolution doesn't follow vite's configuration.
Checking the vitest documentation on external dependency resolution reveals that vitest's underlying runtime logic doesn't resolve external dependencies but passes them directly to node for resolution. Examining the vitest source code also shows that vitest doesn't directly call vite during resolution but uses vitenode. To fix this inconsistency, simply specify dependencies that need special vite resolution in server.deps.inline:
// vite.config.ts
export default {
  test: {
    server: {
      deps: {
        inline: ['vue', 'vue-demi']
      }
    }
  }
};
Related code examples can be found at vue-uni-ui.